NOTE: The following sequence of photos and associated directions is for the installation of the PowerLeap P4/N adapter and Intel Northwood P4 processor in a Dell Dimension 8100 computer. Details will obviously differ for other types of PC's, but the basic sequence should still apply.
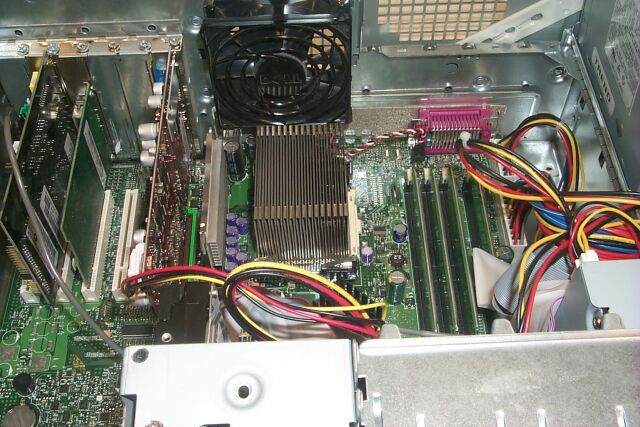 |
In this first photo, my Dimension 8100 case has been opened, the power supply cage has been swung up out of the way, and the green plastic airflow shroud over the processor has been removed. You should also temporarily remove the rear case fan, to give yourself some additional working room, though that hasn't been done yet in this photo. Note the finned passive heatsink mounted on the CPU at the center of the photo. Because this heatsink has no integrated fan, the green shroud is necessary to route the airflow from the case fan over the fins of the heatsink. Without it, the stock processor could overheat. The shroud will NOT be needed (indeed, it won't even fit anymore) after the installation of the PowerLeap rig, with its integrated cooling fan. The old shroud is reputed to make a nice little planter, though!
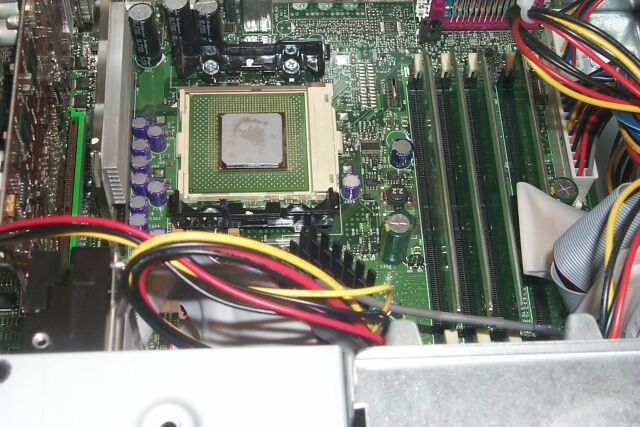 |
Here, the heatsink has been removed, exposing the stock Willamette P4 processor beneath. The square silver-gray heat spreader on top of the processor chip is clearly visible. To remove the heatsink in the Dimension 8100, there are two clips holding the unit down on either side (front and back, as this photo is oriented). These are easily removed by depressing a thumb tab at one end of the clip, then popping it off the retaining tabs on the processor socket frame. Remove both clips and set them aside, because you'll need them later to mount the PowerLeap heatsink/fan assembly.
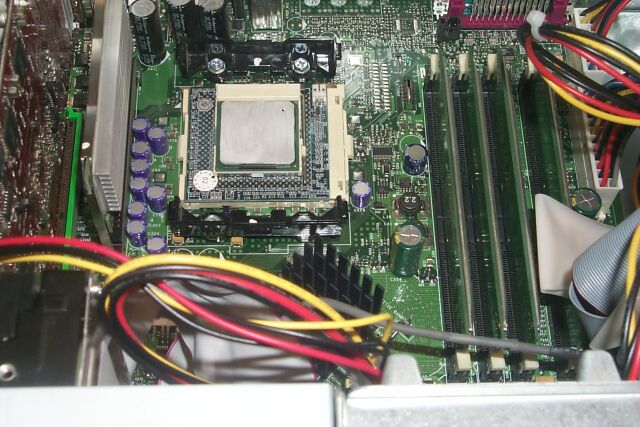 |
The old Willamette P4 processor has been removed and replaced with the P4/N adapter. This is a simple matter of lifting the retaining bar on the side of the ZIF socket frame and gently lifting the old P4 straight up. The P4/N then goes in and fastens by reversing that same process. Proper orientation of the P4/N to the motherboard socket is easily discerned by inspecting the pin arrangement on the bottom of the adapter and matching it up to the socket hole configuration. Note that the new Northwood P4 has already been mounted in the adapter. This is done in a manner very similar to how the P4/N mounted to the motherboard. Also note that a thin layer of Arctic Silver Alumina thermal paste has been applied to the top of the heat spreader on the new processor. Just a small bit will do! And don't forget to attach the included "pass-through" power lead to the small socket on the upper right corner of the adapter, as pictured (not yet attached in photo).
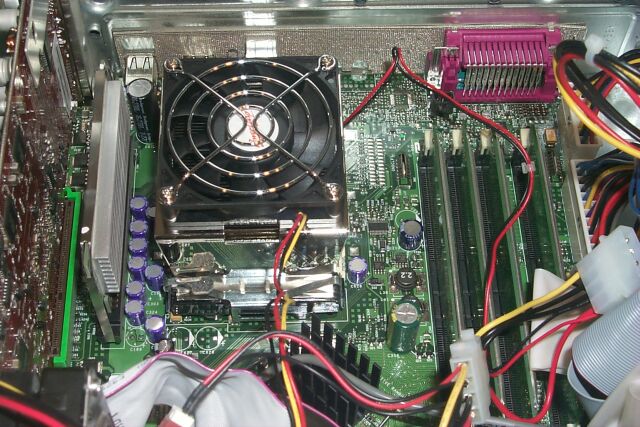 |
This photo shows the adapter with the PowerLeap heatsink/fan (HSF) mounted on it. This is a very nice quality unit that is custom made to fit the spacing introduced by the P4/N adapter. I strongly encourage its use rather than trying to get a good fit with the original passive heatsink or the HSF that comes with an Intel retail box P4. Hey, it's designed specifically for the P4/N adapter, so use it! The unit simply sits down on top of the CPU and the original retaining clips then snap on over the "step" that's cut into the opposing sides of the heatsink block. It's probably a good idea to mount and then remove the HSF once, inspecting the bottom surface of the block to insure that a square "print" of the thermal paste from the CPU is present there. This confirms that the HSF is making proper contact, which is critical to efficient cooling. Now attach the provided pass-through power lead to the HSF and "daisy chain" it to the CPU power lead.
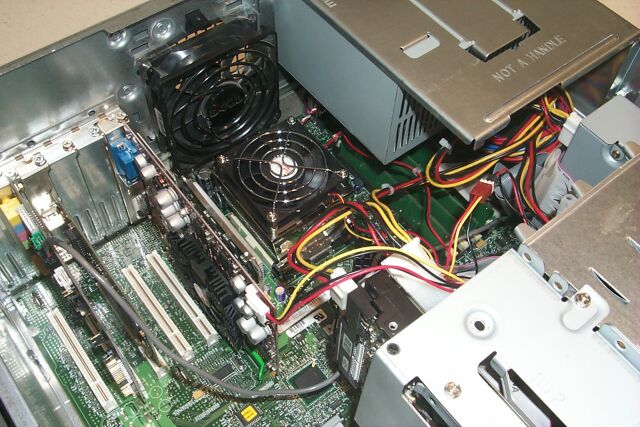 |
Here, everything is installed and ready to go. The linked power leads for CPU and HSF have been attached to a power supply lead. The rear case fan has been remounted, and the power supply cage swung back down into place. Now it's just a matter of buttoning up the case, re-attaching all the connectors on the back of the PC and hitting the power button. PIECE OF CAKE!!!
Now it's time to crank this puppy up and see what she'll do....
 |
 |