|
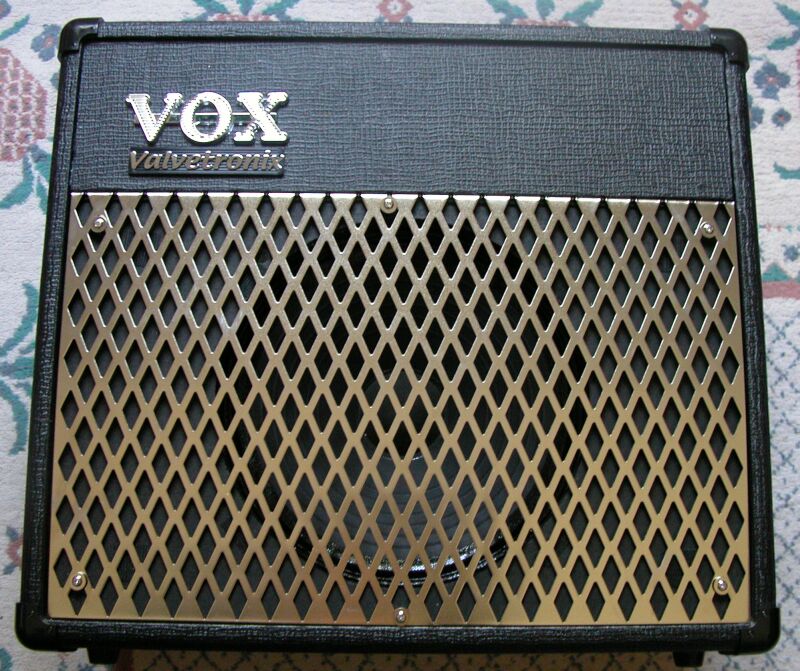
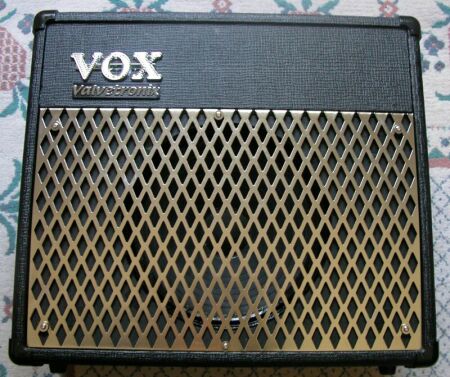
Here's the Valvetronix AD30VT with the stock chrome-plated metal grill. Cold and ugly, if you ask me. It just cries out to be replaced with something with more class and warmth. There's a VOX specialist reseller called North Coast Music who will replace it with a VOX cloth grill when you buy a Valvetronix AD**VT amp from them. Unfortunately, they don't offer this as an aftermarket add-on. But at least you can go to their website and get an idea of how these amps would look with a proper VOX diamond cloth grill. And while you're there, take note of the fact that they sell various size pieces of the VOX cloth in a couple of different colors. Hmmmm, that gives me an idea.... What follows here is a pictorial guide to the way I chose to build my own replacement grill for my AD30VT amp. I make absolutely no claims to craftsmanship, and I had never done anything like this before. So if I could do it, how hard can it be?? If you hate that | |
|
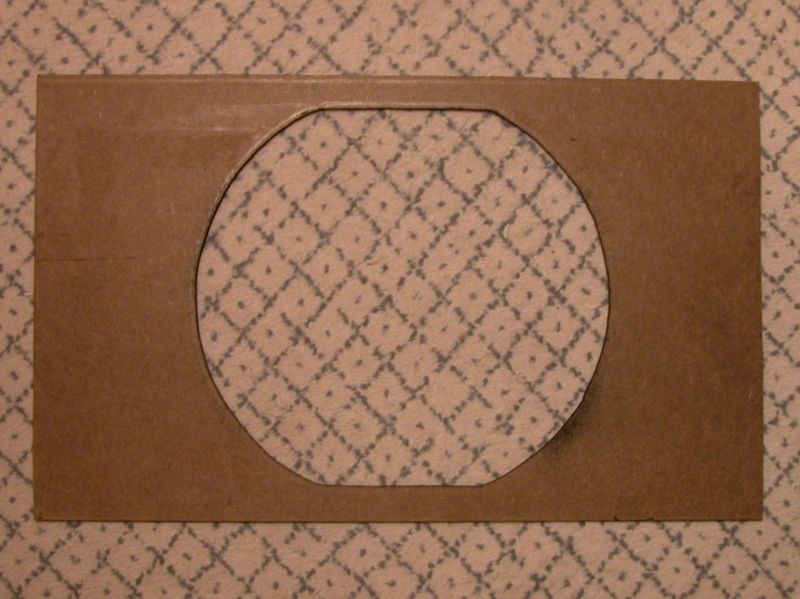
My first step was to decide what I would use to support the grill cloth. Since I wanted it to be thin and stiff, I decided on Masonite, which can be purchased for well under $10 for a 4' x 8' sheet at your local Lowe's or Home Depot. To make it a little easier to handle, I had the store clerk saw it into 18" wide pieces. Next, I made a scale drawing (HERE) of the piece I needed. Dimensions to fit the front of the AD30VT were 16.0" x 9.75", which left a 1/4" gap around the outside of the support template to allow for the attachment of a piece of decorative "piping" around its perimeter. A 9" diameter hole was centered on the pattern, and flattened off top and bottom to give a 3/4" strip of masonite above and below this speaker hole. I decided anything narrower than that might not be strong enough to keep the piece from breaking during routine handling. After marking up a piece of Masonite with this pattern, a helpful guy I work with used a table saw and jig saw to cut it out. The finished support template is shown at left. | |
|
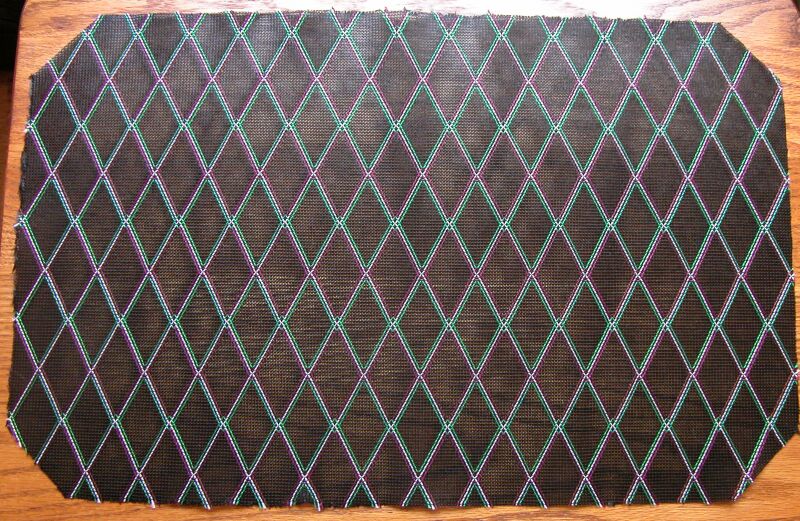
When I purchased the VOX diamond grill cloth from North Coast Music, I opted for the 24" x 36" size ($50), because only a single grill could be made from the smaller pieces they offered. This larger piece was enough for four grills, so my plan was to keep one and sell the others to discerning AD30VT owners with an aversion to the chrome hamburger grill on the front of their amps. I chose the black diamond cloth, but they also sell it in classic VOX brown. The piece I cut out for a grill was 17.5" x 11.25", giving a 3/4" border of cloth around the perimeter for fastening to the support template. Be forewarned--this synthetic fabric is not easy to cut cleanly. Attempts with a pair of scissors (good sharp ones!) tended to chew up the edge pretty badly, so I ended up using a straight-edge and an exacto knife. Be sure to center the diamond pattern of the piece you cut, so that it will look symmetrical when mounted to the template. I also recommend cutting the corners off the cloth at a 45 degree angle just slightly outside of the corners of the template when it's positioned over the cloth (see next photo). | |
|
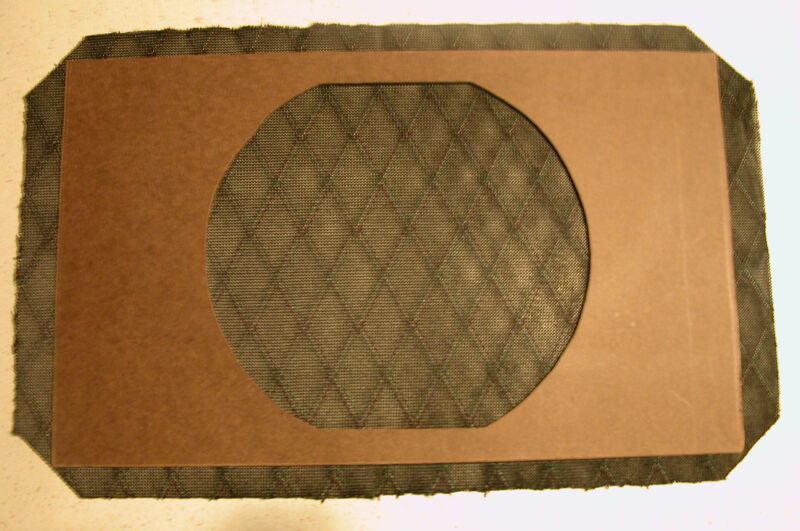
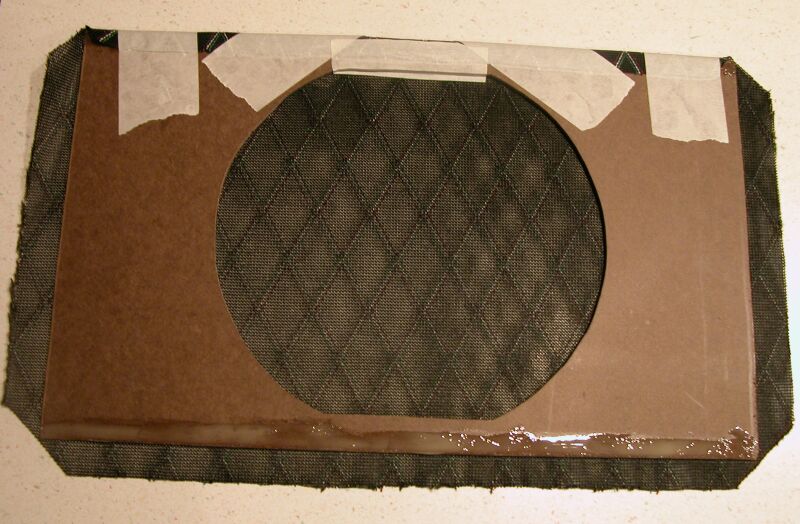
This photo shows the support template positoned on top of the back side of the cut piece of cloth, in preparation to attach the cloth to it. You can see the depth of those 45 degree corner cuts of the cloth clearly here. Their function is to make it easier to wrap the cloth around the edges of the support template and avoid bunching up excess cloth at the corners. Because Masonite is very hard and fairly brittle, I pretty much ruled out stapling the cloth in place as a viable means of attachment. Instead, I opted to glue it to the template. For this purpose, I chose a polyurethane construction adhesive. Other adhesives would certainly have worked for this task, but the polyurethane was also recommended for gluing plastic and vinyl, which is exactly what the decorative piping is made of. So this single adhesive would work for the whole project. | |
|
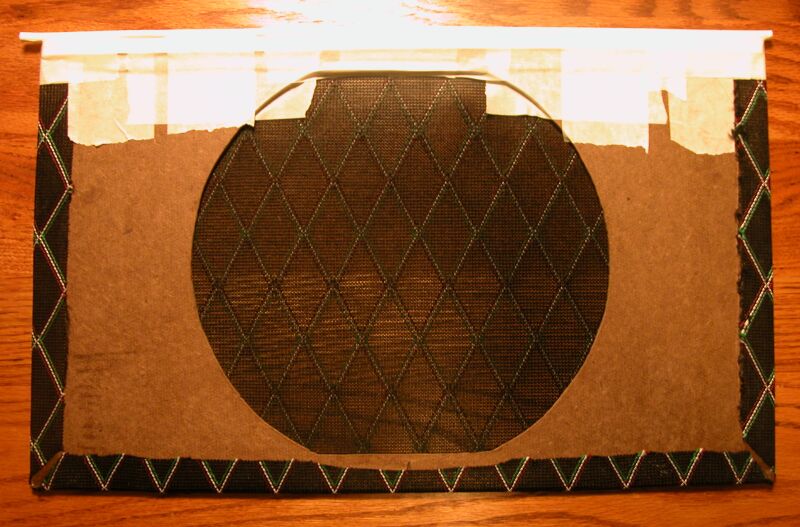
Here, I've started the process of gluing the cloth to the support template. The top edge has been glued and taped down with masking tape while the adhesive dries. This is necessary because the cloth is quite stiff (a plus for holding its shape and not sagging) and tends to lift away from the template surface when the glue is still wet. Using ordinary masking tape does the job pretty well, but you have to criss-cross the tape a bit to get it to hold to the cloth, which has quite a slippery surface. Along the bottom edge, you can see where the adhesive has been applied to fasten the cloth. Just pull it taut, fold over onto the glued surface, and tape it in place. Repeat this process for the sides, then turn the template right side up, place on a flat surface with some weight on the top, and allow the glue to dry overnight. | |
|
Here's the grill piece from the back, after the glue has dried and the masking tape has been removed. You can see the final effect of those 45 degree corner cuts of the cloth here, since it completely avoids any bunching or doubling over of the fabric in the corners. Everything stays nice and flat--a critical element when it comes to gluing on the decorative piping, which will be the next major task. By the way, in several of these photos, the edges of the grill piece appear to be slightly curved. This is an illusion created by the camera, when taking photos in close. I assure you, all those edges are completely straight! | |
|
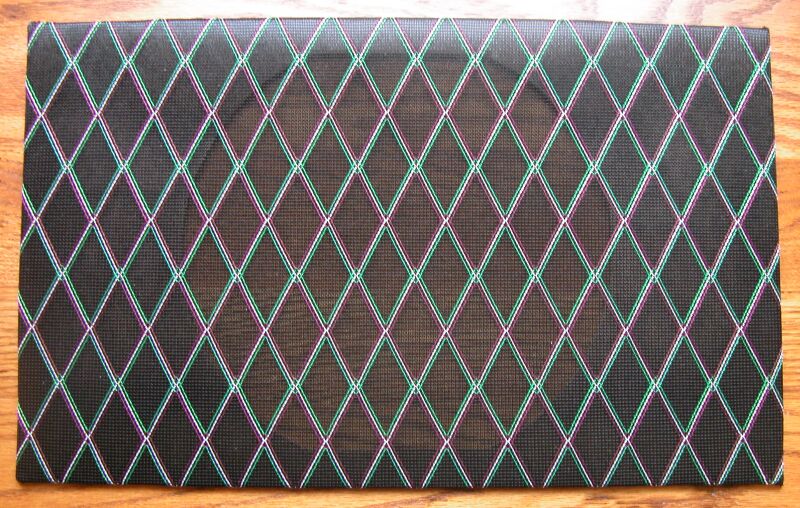
Another shot of the grill piece after the glue has dried, this one from the front. Notice that the fabric lays nice and flat, with no wrinkling or sagging evident. Note also the symmetry of the diamond pattern top and bottom and side to side. It takes a bit more care when cutting the fabric and positioning the support template for gluing, but I think the effort is well worth it in the finished appearance. Now, we're ready to move on to what I found to be the most difficult part of the project--attaching the decorative piping. I also bought this from North Coast, opting for the 3/16" UK/JMI white piping with a mounting "flange". This is basically just a flat strip of plastic that extends from one side of the piping, allowing it to be glued or stapled to a mounting substrate. Again, due to the nature of the Masonite, I opted for the former. | |
|
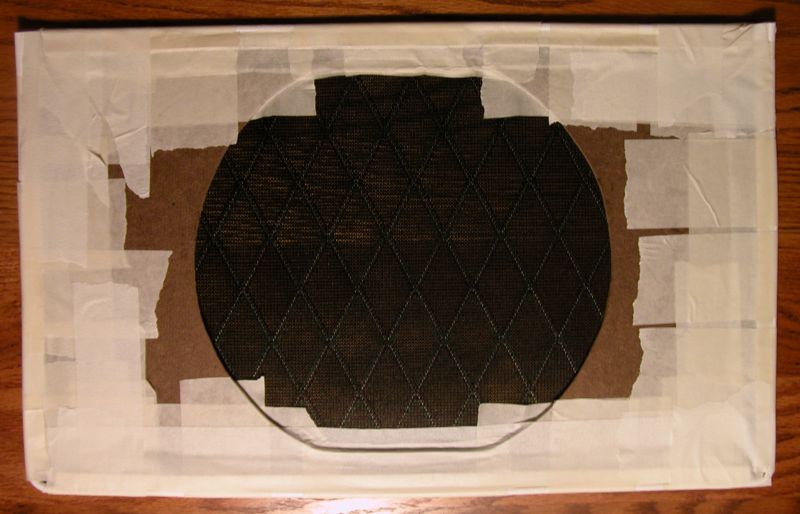
Here, a piece of the flanged piping has been cut to length (leave about 1/4" overhanging at each end) and glued in place along the top edge of the back of the grill piece, then taped securely in place. This requires a substantial amount of tape, because this piping is quite stiff and tends to lift away from the grill piece. To glue it, I applied a thin stripe of glue about 3/8" wide along the upper edge of the grill piece, on top of the glued fabric. The flange is then laid over this glue stripe, with the bottom edge of the tubular portion of the piping snugly against the upper edge of the grill piece. It's helpful here if you can get someone to hold the glued piping in position while you apply the masking tape to hold it firmly in place. One comment about the tape. While the masking tape adheres quite poorly to the cloth, I consider this a good thing. That's because it comes off easily once the glue has dried, and leaves no residue on the cloth. Resist the tempatation to use tapes with stronger adhesives (like duct tape!), because they will leave a residue on the cloth, which is quite difficult to remove. I learned this the hard way on my first grill! So just get yourself some decent all-purpose masking tape and use it liberally! | |
|
Now comes the toughest part. For the remainder of the piping, I went with a single piece running down the sides and across the bottom. This means that you have to make two 90 degree turns with the piping around the bottom corners of the grill piece. To do so, you'll need to remove the flat flange section where these corners will be, or you just won't be able to get a tight radius on the bend. The piping flange is notched about every 1/4", and I found that removing three of these sections with an exacto knife did the job nicely. The photo at left shows this "notched" section of piping. Since you'll be working with a single length of the piping about 36" long, be sure to measure and mark out everything carefully. Determine exactly where the corner bends will be and remove the sections of flange there. I'd recommend leaving a little extra piping protruding up at each end. We'll finish off these two upper corners after the glue dries. For this reason, don't apply glue for the last 1" or so at the top of each side of the grill piece. This makes the final trimming and fit-up of the ends of the piping pieces much easier. | |
| ||
|
Here, the gluing of the piping has been completed and thoroughly (!) taped down while it dries. The two 90-degree corners in the piping are at the bottom of the piece. The two ends of this long piece of piping overlap the ends of the piece glued along the top in the photo. Once the piece has dried thoroughly and the masking tape has been removed, the upper corners can be finished. The best way to describe the finishing of these corners is to show a close-up photo, seen HERE. I recommend trimming the ends of the top piping piece to overhang the grill by the width of the tubular portion of the piping, about 3/16". Next, trim off the flange piece beneath this overhanging section. Now, cut the vertical piece of piping so that its end is flush against the overhanging piece above it. Then, trim off the first half-inch or so of the flange. This allows the vertical piece to then lay flush against grill surface. Glue it in place and tape it down until dry. This should give a nice, clean butt joint in the two upper corners of the piping. If you'd rather attempt a miter-style joint, be my guest. | |
|
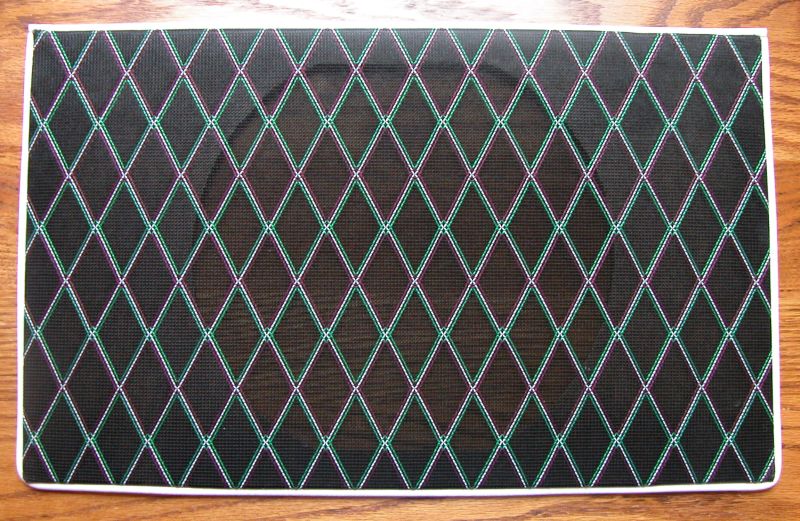
We're in the home stretch now! Here's the grill with piping attached, ready for mounting into the front opening of the AD30VT. Looks pretty good, if I do say so myself! Now, we have one final decision to make--how best to attach the new grill piece to the amplifier. | |
|
Actually, I made that decision pretty early on in the project, opting to go with adhesive-backed velcro for the mounting of the grill to the amp. I've seen this method used on several home stereo speaker systems of a much larger size, and it avoids the need to do any drilling, nailing or stapling into the amp itself. I purchased a package of adhesive-backed pre-cut 1" velcro squares for this purpose. The photo at left shows how I positioned the squares. There is one square each placed about an inch in from the edges at the four corners of the back of the grill piece. Just peel off the protective backing and push the velcro square firmly onto the Masonite surface. I used the "fuzzy" velcro squares on the grill piece, with the "hook" velcro attaching to the amp, but that really doesn't matter, as long as you stay consistent on which goes where. I also took two squares and cut them in half, placing these four half-pieces around the perimeter of the speaker hole, as shown. Actually, you really only need two along the horizontal midline, since the purpose of these pieces is merely to eliminate any vibration of the grill around the speaker. | |
|
Mounting of the grill into the front opening of the amp couldn't be easier. Just attach the matching "hook" velcro pieces to their fuzzy brethren, peel off the protective backing to expose the adhesive, then carefully position the grill and press firmly against the front surface of the amp opening. Apply firm pressure at the positions of each of the velcro pieces, to insure that the adhesive makes solid contact against the front of the amp. Bingo--you're done!! The photo at left shows the finished project. What a difference! That cold, industrial-looking chrome abomination has been replaced by a classy traditional VOX cloth grill. OK, time to plug in, power up, and get back to the business of making the windows rattle with a sonic assault from my Strat or LP.... | |


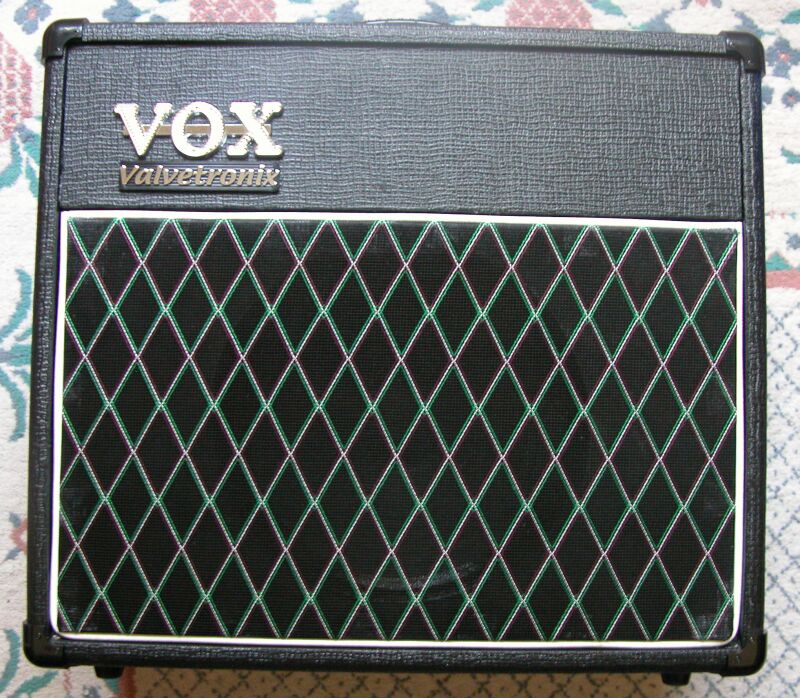
Side-by-side comparison - VOX Valvetronix AD30VT before and after:
| BEFORE | AFTER | |

Click HERE to go to Duh Voodoo Man's VOX Valvetronix main page.